Table of contents
No headings in the article.
Hello everyone,
This article will provide a guide on how to set up a Jenkins server on an Ubuntu or Debian server, covering all the necessary steps to install and configure Jenkins for your needs. As a DevOps engineers, we need Jenkins to help us automate software development processes, and enable us to build, test, and deploy our applications more quickly and efficiently. You can install, configure and start using Jenkins to quickly automate your software development processes by following this article's instructions.
Prerequisite :
Here are some prerequisites to install Jenkin on AWS ec2 instance/server.
AWS account.
Go to aws Console
Login to AWS console account with Admin credentials.
Search for EC2.
Click on Launch Instances

Create EC2 Instance ( Ubuntu, Type- t2.micro).
Choose t2.micro for the free tier.
Click on Launch instance

Login to your ec2 instance
Connect ec2 instance with ssh or Public IP
Now check for updates packages by running this commands
sudo apt-get updateJAVA Installation: Java is a prerequisite for running Jenkins. while some Linux distributions do not come with Java by default, so let's install OpenJDK.
Now install Java by running below commands
sudo apt install default-jdk -yNow check java is installed by running below commands
java --version
Now update packages by running below commands
sudo apt-get updateNow add the below keys to install Jenkins on ubuntu system
curl -fsSL https://pkg.jenkins.io/debian-stable/jenkins.io-2023.key | sudo tee \
  /usr/share/keyrings/jenkins-keyring.asc > /dev/null
curl -fsSL https://pkg.jenkins.io/debian-stable/jenkins.io-2023.key | sudo tee \ /usr/share/keyrings/jenkins-keyring.asc > /dev/nullNow update packages by running below commands
sudo apt-get update
Jenkins packages has been added.
Run the below commands to install Jenkin in Ubuntu system
sudo apt-get install jenkins -yNow Jenkin has been installed on ubuntu system, Run below comands to check if jenkin is installed and running.
systemctl status jenkins
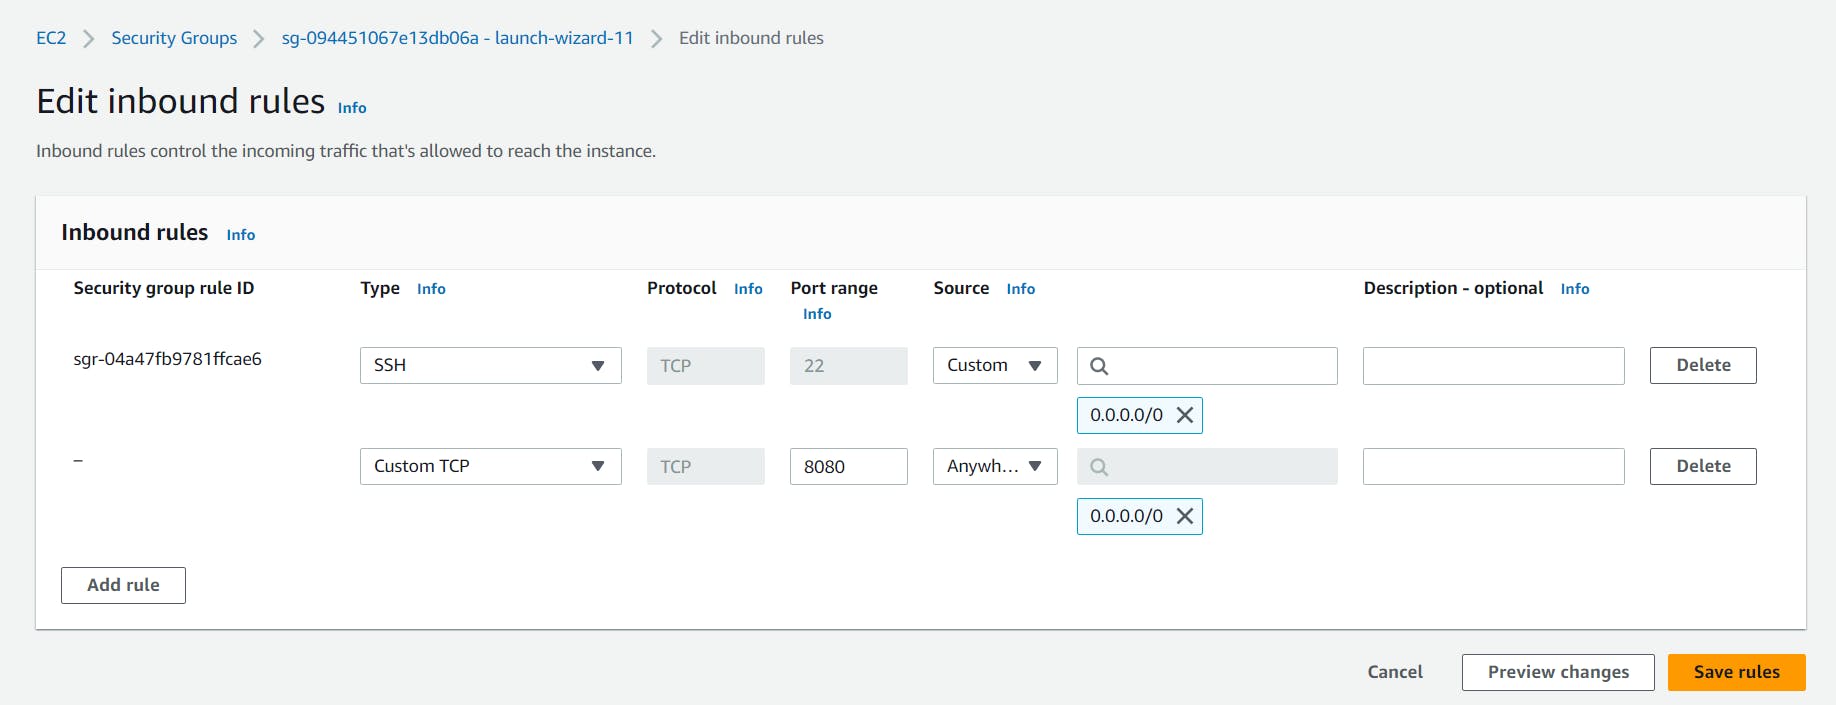
Form the above snapshot it is clear that jenkin is running on port:8080 , Now go to aws security group and enable port :8080 and hit your public ip with Port:8080 Jenkin as per below snapshot :


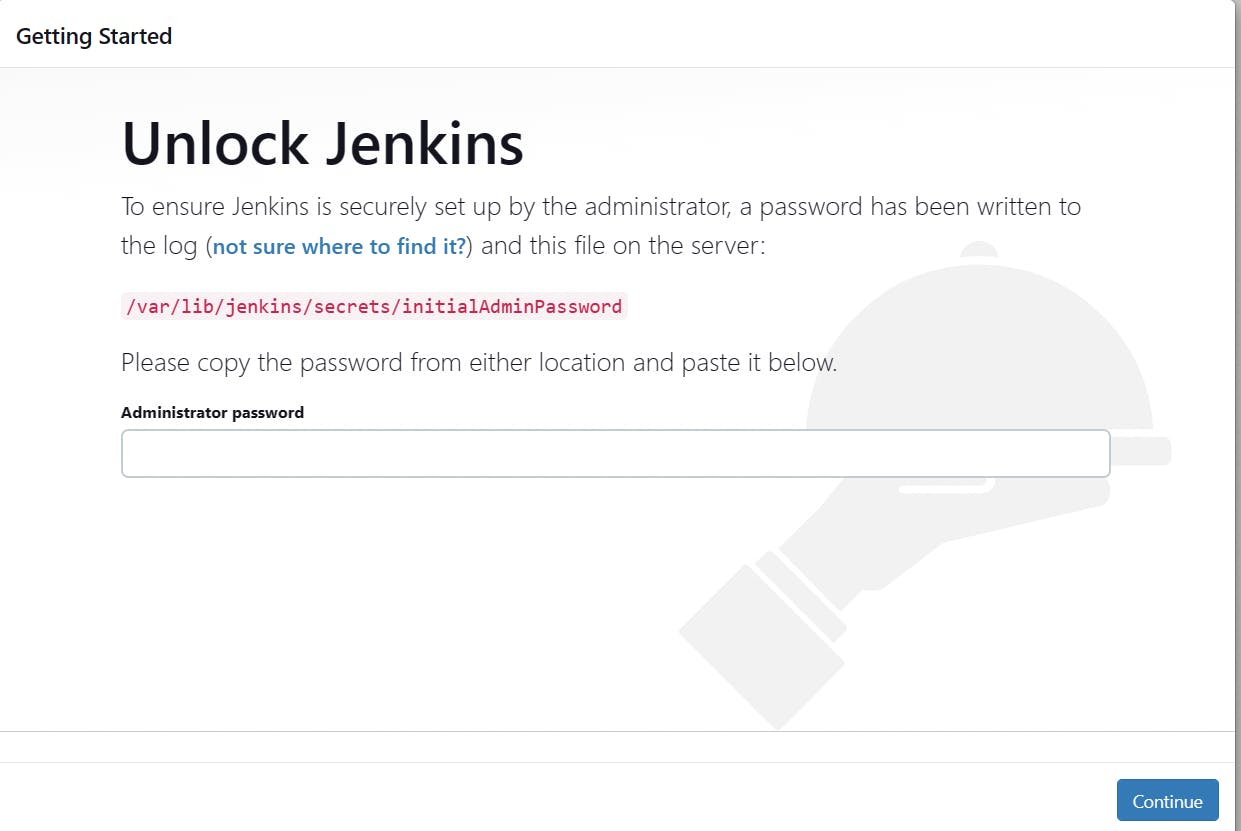
Now Unlock Jenkin with Admin Password by running below commands
sudo cat /var/lib/jenkins/secrets/initialAdminPasswordBy this command you will get admin password paste here and click on continue
Click on install suggest Plugins

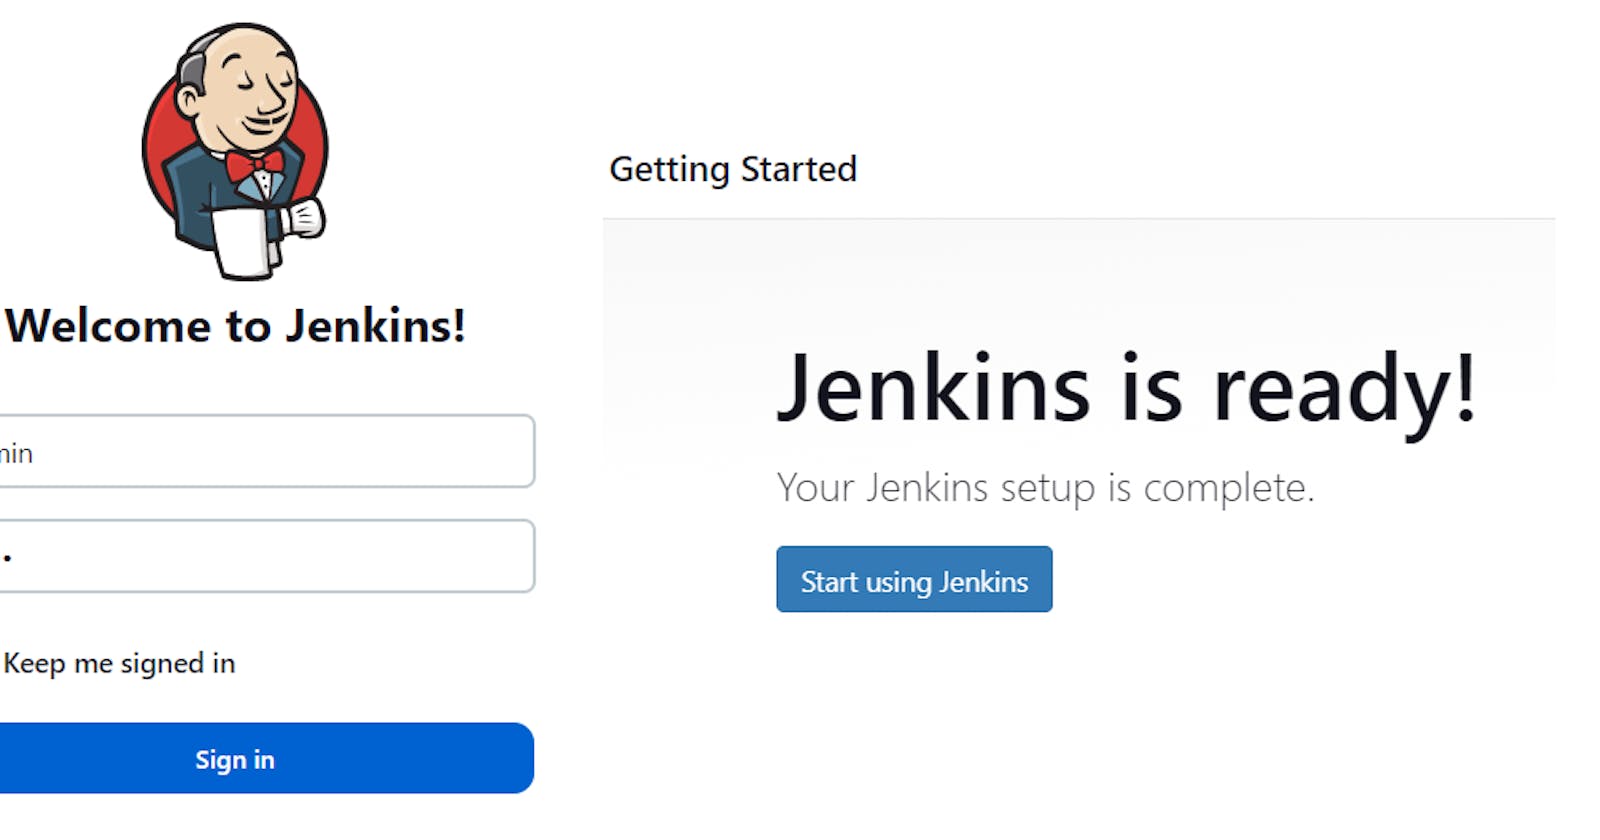
Fill below form provide username, Name, Email , password, click on save and continue.
Congratulation Now Jenkin installation has been completed, Now click on start using Jenkins.

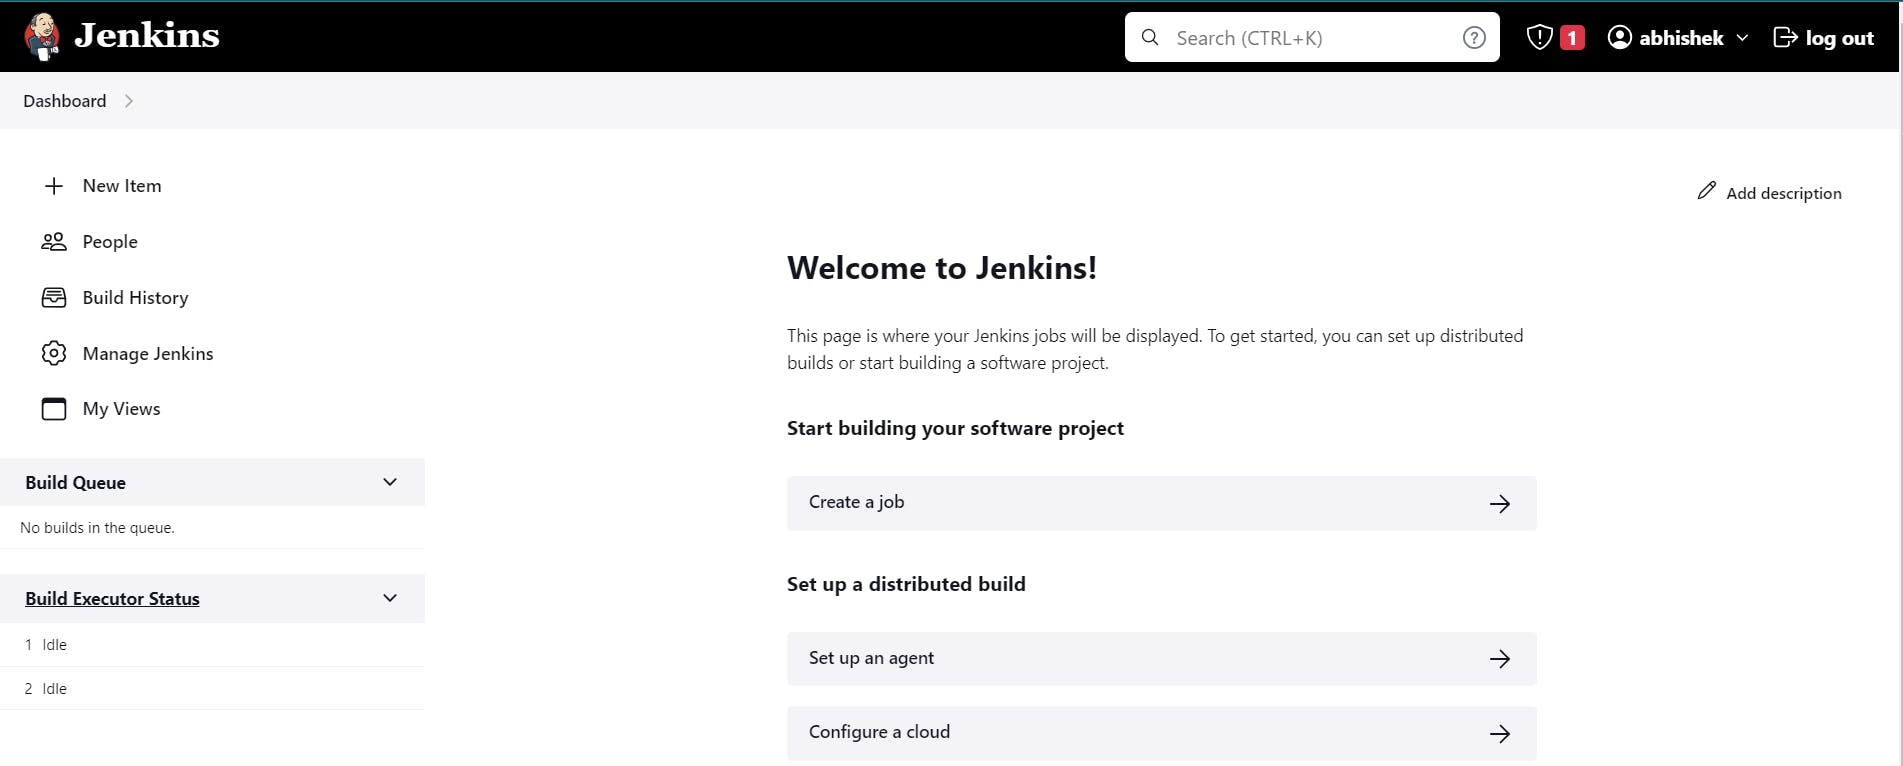
Jenkin Dashboard will be opened.

Conclusion :
This was some steps to setup an ec3 instace and install jenkin server some of the steps outlined in this article are based on the official documentation provided by Jenkins for installing the software on Linux. We hope by following the steps outlined in this article, you should now have a fully functional Jenkins server up and running on your Ubuntu server. If you have any feedback or questions, please feel free to leave a comment below.
